Vintage Tokai ST Re-fret


These two vintage Strat replicas made in Japan in the late 1970s are amongst the jewels in my collection. What we have here is an ST-60 in Flamingo Orange and an ST-100 in Golden Sunburst, both made in 1980. The frets were badly worn and far too low for the guitars to be truly enjoyable to play. So, I decided it was time for a re-fret.
I have done a fair amount of fretwork in the past, but this was my first time re-fretting rosewood laminate fretboards. Given how thin and delicate the laminate is, I was naturally concerned about causing damage. Still, in its original state, the guitars were not rewarding enough to play, so I took a deep breath, gathered my courage, and moved forward with as much care, patience, and precision as I could.


This is what the fretboards looked like...


Step one was to carefully remove the tuners and the nut without braking it or chipping the fretboard...
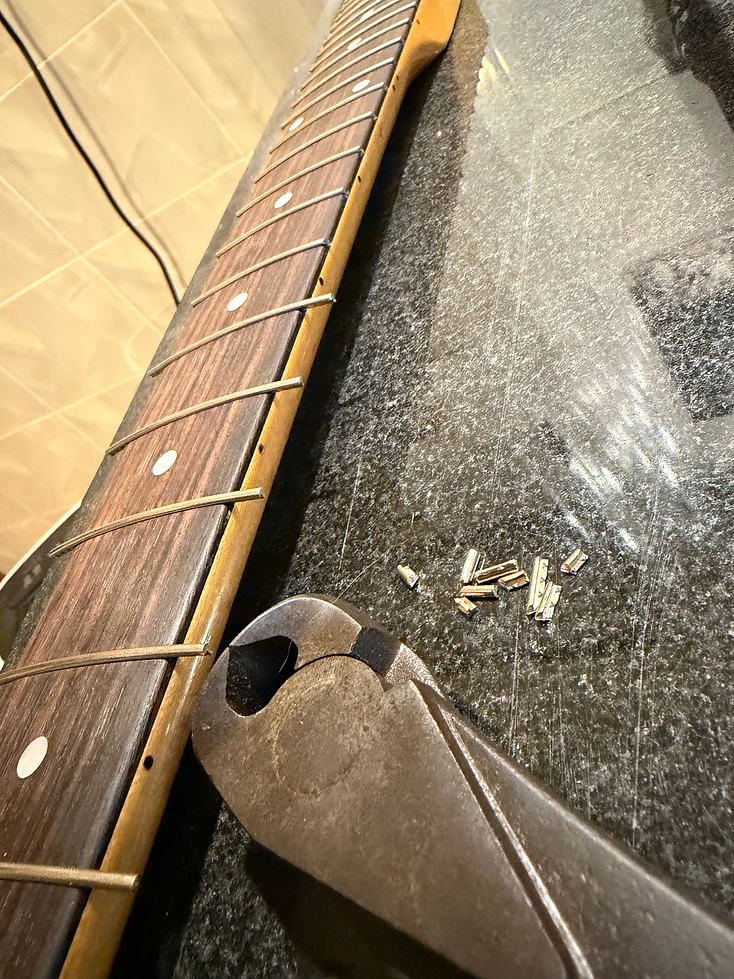
Removing the frets without chipping the fretboard was very important. I took my time with it, ensuring that I provided sufficient heat and clipping from the edge and moving along very slowly and gently.


Once the frets were out I needed to prepare the fret slots for taking the new fret wire. First I used Stewmac's fretting saw, which has a rather narrow blade. I chased it with a slightly thicker blade from a Japanese saw. And, finally, I used a triangular file to open the mouth of the fret slots just a little so the fretwire could go in without chipping the edge of the slots.


Then I took 220 grit sandpaper with a 7.25 inch radius sanding beam to the fretboard to sharpen the profile as it was intended to be. I followed this with 400 grit sand paper on a straight sanding beam, and finally 2000 grit paper just with my hands for smoothening. I was very careful not to sand the fretboard too much because this rosewood laminate is only a few mm thick!


I don't love brass hammers when it comes to putting new fret-wire in. There is opportunity, with vintage fretwire (which is low and narrow - as in this case) to hit and dent the fretboard. Also, I find that it doesn't evenly push the frets in at times. So, I created by own fret press jig. Maple hardwood, a slot for the brass radiused fret insert, a screw to hold it in place, a magnet at the other end to clip on to the clamp, and that's it! The key here is to ensure that the fret slot width is the right measure - too tight and the frets will struggle to press in flush and even cause damage. Too wide and the fret-wire teeth will have nothing to bite into. I press the fret it and then apply low viscosity super glue from each end of the slot - allowing it to get wicked up and fill in the the entire slot neatly.
Then its time to dress each fret and polish using a variety of grits from 400-8000.


Finally, a new nut was needed for one of the guitars...
And, done!
If you'd like to know more about the history of this guitar, check out my guitar collection website --> link.