Boston / Windsor Inspired Rocker
This was my first non-guitar woodworking project. When my mother noticed an antique Boston Rocker in my house, she asked me to make her a rocking chair. I agreed right away. In hindsight, a rocking chair was far too ambitious a project for a novice woodworker like myself. I started and stopped many times out of frustration, but 350 hours and 2.5 years later, it was finally done.

I used European Ash for most of the chair, along with Hard Maple for load bearing spindles, and Flexi-ply for all bends.

First, I joined two pieces of ash to make the seat. The underside is reinforced with a small square piece of maple glued across the centre seam—just in case. I then drilled angled holes, calculated with the help of The Chairmaker’s Notebook (link). Calculating the angles was hard, but holding the drill and eyeballing those angles with a large auger bit was even harder! I would definitely not recommend doing it this way. A laser levelling tool is essential at this stage, because the angles at which these deep holes are drilled directly affect how the undercarriage spindles and the backrest come together. These angles are probably the single most important factor in the success of the project. I managed with a little luck—and a little bending (or rather, forcing) of the spindles into the headboard and undercarriage.


Next, it was time to shape the seat. I used a bunch of tools here, including an orbital sander, angle grinder, and card scrapers. A curved drawknife is actually the right tool to use here, but I didn't want to buy one just for this project.


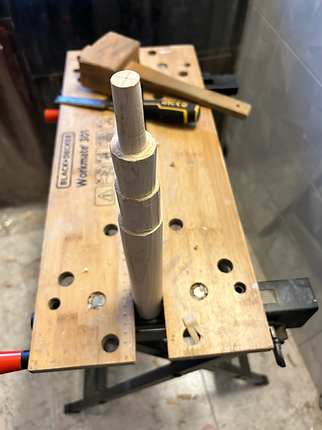
The most time consuming part was the spindles. I did not have access to a lathe, so I turned each and every one of the 21 spindles by hand. They took between 4-7 hours each! As you can see in the pictures here and the videos, I used many tools to move from square to round...


I did not have a steam machine for bending wood, and making one seemed a bit too much work for just one chair, so I used Fexi-ply instead. I created two jigs to help me with bending the Flexi-ply to the radius I needed and glued them up to take the precise forms of the headboard and rockers....


It was time to carve out the arm rests. I started with a pretty thick slab of ash that I cut into a gentle upward curve. And then I decided to but a laser level tool to help me drill accurate dowel holes through the maple spindles into the arm rests.


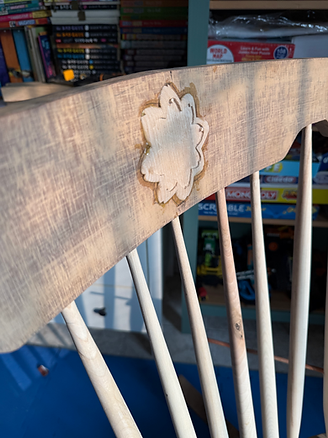
I love working with mother of pearl, so I decided to add some to the headboard. I made an original design - a flower with a 9-point star inside (because of it's religious significance to my mother). Now, the headboard was bent and the radius was not allowing me to use a router for the inlay work. So, I had to make a small wooden panel to hold to mother of pearl, such that the wooden panel would have a flat front but curved at the back to match the radius of the headboard (which I identified was about 16 inches, thanks to my guitar fretboard sanding beam). I then glued the wooden panel, shaped it to match the flower, and inlaid the mother of pearl into it.


Time for gluing and assembly! I used wedges for the mortise and tenon joints, as recommended in the Chairmaker's Notebook. I then proceeded to test the chair for one month, just to make sure it won't break on my mom :)


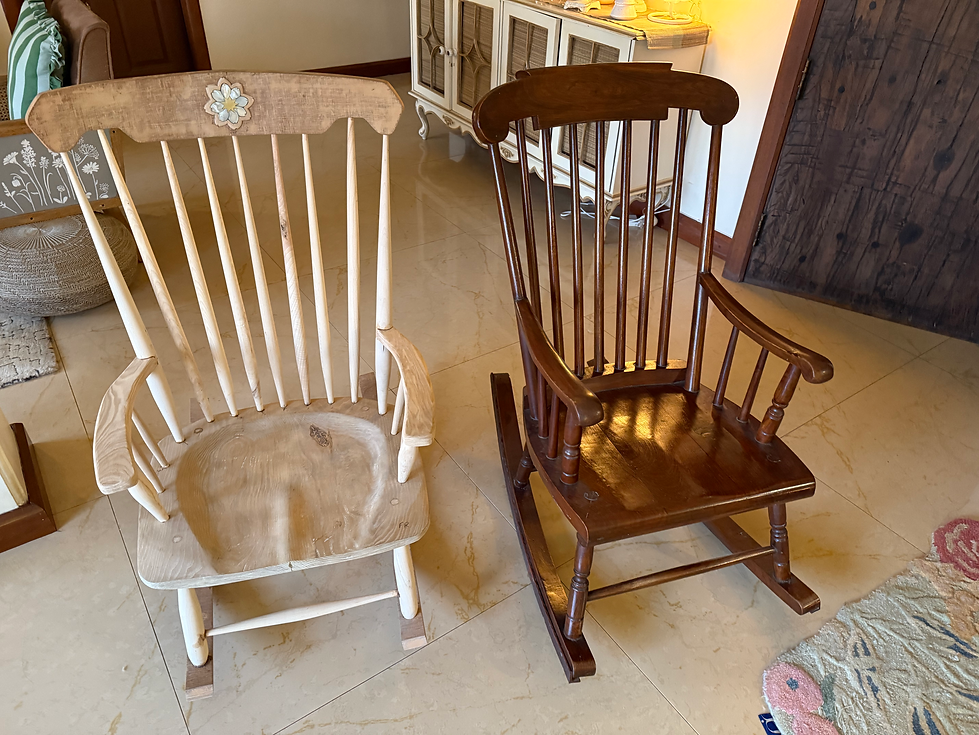
Sitting next to the antique Boston Rocker that inspired the project
Finishing time! I used Annie Sloan "Primer Red" chalk paint for the undercoat, and "Knightsbridge Green" satin paint for the top coat. And then I did some very gentle distressing, such that the red just barely shows from underneath the green in those areas that would typically see the most wear over time.


